Monday, August 29, 2016

How to use Disney Emojis (From the Disney Emoji Blitz app) in Snapchat

Hey guys!

Today I'm going to show you how to use Disney Emojis from the Disney Emoji Blitz app in Snapchat!

These are my own instructions that I made myself - I was just messing around with the emojis in Snapchat until I figured out how to use them in the app. Okay, let's get started -

Unfortunately, you can not paste the emojis into a caption on a picture, but you can send them as an image in the messaging section of the app. Here's how:

Step 1: Open your Snapchat app.

*Personal names
have been removed
 for safety.*


Step 2: Tap on the name of the person you would like to send Emojis to.


Step 3: Open your Disney Emoji Blitz keyboard.


Step 4: Type in the Emojis you would like to send.


Step 5: Copy your Emojis.


Step 6: Paste Emojis into the text box.


Step 7: After you click "Paste", this will pop up.


Step 8: Click send. Now you have sent Disney Emoji Blitz Emojis to your friend!


Bonus: 

When you see the screen below, before you hit send, you can add stickers, text, and more! 


I hope you guys liked this tutorial on how to use Disney Emojis from the Disney Emoji Blitz app in Snapchat!

Bye guys!

Sincerely,
The Wonderlandiful Crafter :)

Thursday, August 18, 2016

Doll/Toy Photography

Hey guys!

I just wanted to let you know about something I will start doing on my Instagram page -

I really enjoy doll/toy photography, so I will start posting my photos on Instagram. Today I posted a few of my dolls and Lego minifigures on a rock climbing wall that I made using MyFroggyStuff's tutorial on YouTube.

Make sure to follow @wonderlandifulcrafts on Instagram for more toy photography, and subscribe to MyFroggyStuff on YouTube!!

Bye guys!!

Sincerely,
The Wonderlandiful Crafter ;)

Tuesday, July 26, 2016

3-Pen Challenge

Hi guys!
I want to show you a drawing a did using 3 pens to draw it. Therefore, this is the 3-pen challenge!

Similar to the 3-marker challenge that is all over the internet, I picked 3 pens that I had to draw something with, rather than coloring something in. I did not do a blind pick pen challenge, but I can in the future if you guys would like me to. The three pens I used were Zebra Sarasa 0.7 gel pens in the colors red, purple, and blue.


Here is my finished drawing:


I drew a girl with two faces, one happy, one sad. I have to admit, I did kind of screw up on the lips. A lot. :( But anyway, I really liked the finished drawing, and I had fun coming up with an idea for a picture to draw with only 3 colors of pens.

If you do the 3-pen challenge, show me on Instagram using #wonderlandifulcrafts!

Bye guys!
Sincerely,
The Wonderlandiful Crafter :)

Lego Minifigure Series 16

Lego Minifigure Series 16 is at Toys R Us!

About a week ago, I went into Toys R Us, and the first thing I saw caught my eye. The bright yellow Lego Minifigure Series 16 boxes were sitting on a shelf in the front of the Lego aisle!

I ran over with my mom, my brother running back to get a basket. My family and I are quite good at feeling the packages to figure out which minifigure is in which. After about an hour of feeling, we had found (hopefully) all of the minifigs, and went to check out. Then the second we got in our car, we tore open the packages to find that we did indeed end up with all of the minifigs.

Here are some tips we have discovered about feeling for the Series 16 Lego Minifigures:


Ice Queen: She is easier to guess because she is the only minifig in the series that has a sloped skirt. 


Bandit (with turban): The turban is and okay piece to search for, but also go for the sword and the piece for the hilt.


Cyborg Woman: Looking for the smaller pieces is easier, so go for the orange stud on the end of her blaster. You can also look for the chest plate.


Halloween Costume Kid (in devil costume): Look for the trident, the jack-o-lantern bucket, and the short legs. There are only two minifigs in the series with short legs (this one and the Penguin Suit Guy), so if you have found short legs, there's a good chance you have found this minifig.


Goth Boy: Look for the spider and the book; they are distinctly different shapes from anything else in this series.


Explorer: Look for the 2x2 and 1x1 tiles. The only other minifig with a 2x2 tile piece is the Pirate, but he is easy to decipher from the Explorer because he has a sword. The Explorer also has a backpack that can help you figure how who he is.


Explorer with Penguin: Look for the camera. As I said before, it is easy to figure out the character based on small pieces, such as the camera. The camera has a small handle that will let you know what it is. The penguin itself is also okay to look for.


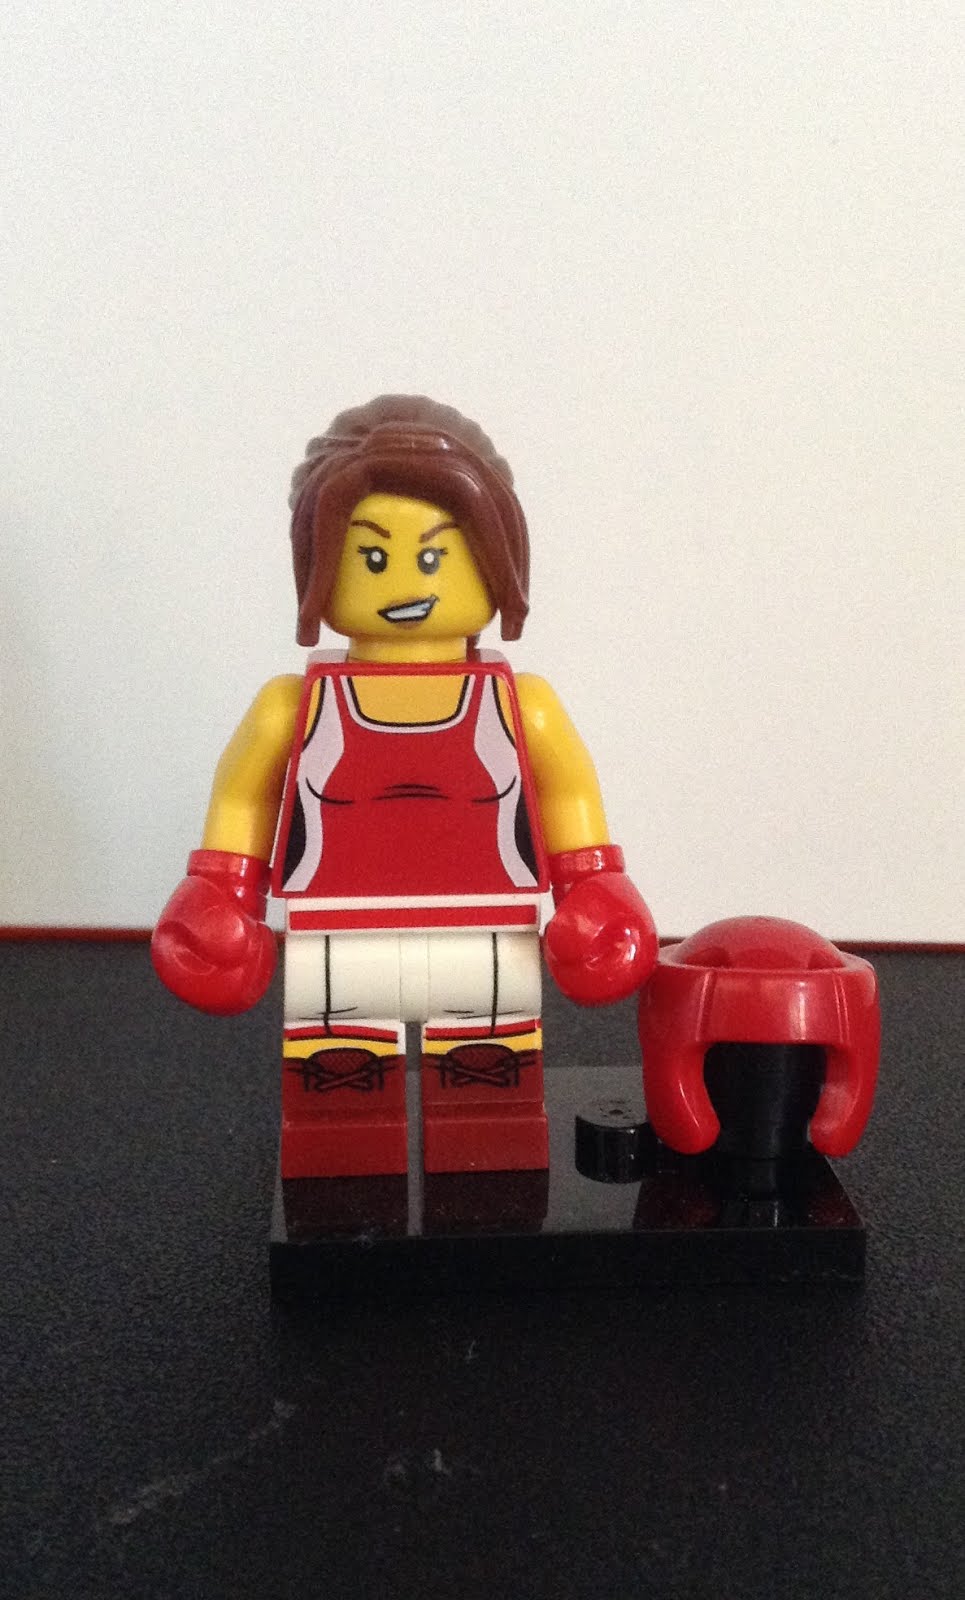
Boxing Girl: This minifig was the hardest for me to figure out because she is fairly simple. After opening her, I found out that she has both a HELMET, and HAIR. This minifig also comes with a  black round piece. It's kind of hard to explain, but basically it is shaped like a cylinder and the hair and/or hat fits on it while the minifig is wearing the other. That is a good piece to look for, although, I originally planned on buying an extra babysitter, but I mistook that piece for the baby's bottle. 


Pirate: As I said before, look for the 2x2 tile, and the sword.


Penguin Suit Guy: Look for the short legs, like for the Halloween Costume Kid, and the Penguin Suit Guy's ice skates.


Hooded Archer: Look for the bow and arrow, and the 


Dog Show Guy: For this one, you can look for the dog, but I found it easiest to look for the trophy. It has a handle on either side,  and open mouth, and a base similar to a tall Lego glass, making it easy to feel.


Mariachi Band Guy: Look for his sombrero and his guitar.


Agent: The rope he is holding is the most obvious giveaway, but his spy glasses and his gun are also easy to feel for.


Banana Suit Guy: Look for the - you guessed it- the banana. It is huge, and if you are holding a package with the Banana Suit Guy in it, trust me, you'll know. ;)


Babysitter: Look for the baby bottle, the baby's head, and the baby's body. They are the three smallest pieces that you will find it that bag, so look for them if you are searching for the Babysitter minifig. I personally think that the bottle is easiest to feel for, but as I said above, in looking for my second Babysitter minifig, I mistook a round black piece for the bottle and ended up with a second Boxer Girl.

Okay, so this is the end of my guide to the Lego Minifigure Series 16! Comment below or on Instagram if you find this amazing set of minifigs, and who your favorite is! (Mine is definitely the Babysitter!)

Bye guys!
Sincerely,
The Wonderlandiful Crafter :)

Tuesday, June 28, 2016

Flower Headband

Hi guys! Welcome to the last installment of the #flowerlandifulcrafts craft series! Today I will be showing you how to make a flower headband. Also, I am going to be on vacation for 2 weeks next month, so I may not be posting a lot in the month of July. Anyway, let's get into the tutorial!

Supplies:
- pipe cleaners/chenille stems
- artificial flowers
- elastic string (also sold as "stretch lace")
- hot glue and hot glue gun (optional, but will keep the headband together much better)

First, measure and cut a pipe cleaner to fit over the top of your head. If one pipe cleaner is too short, just twist together two. Then fold in the ends to prevent scratching your head later.


Now, arrange your flowers over the pipe cleaner the way you would like them to make sure they fit/make sure you have enough flowers.


Next, cut a pipe cleaner into 1-3 inch pieces. You may need to cut up more than one pipe cleaner depending on how many flowers you are using. Take your glue gun and put a drop of glue on the top of each short piece of pipe cleaner. Now stick the pipe cleaner into the flower stem part, and wait a few seconds for it to dry. Now set your flowers off to the side. You also can decide to not glue in the stems if you don't have hot glue, etc., but the flowers can fall off quite easily if not secured to the stems with hot glue.


Now go back to your long pipe cleaner that fits over your head. Hold it up to your head, and then cut a piece of elastic string that will make it loose enough to fit on your head, but tight enough to stay on. Tie a knot with the elastic on one end of the pipe cleaner, fold up a little piece of the pipe cleaner, twist, and repeat on the other side.


Now take your flowers with the pipe cleaner pieces attached to them. Begin twisting the pipe cleaner pieces around the base pipe cleaner, attaching the flowers to the headband. Repeat with all of the flowers.


Now all you have to do is just play around with the flowers until they are the way you like them, and you're done! These flower headbands are similar to the flower crown D.I.Y. I did, but they are less bulky and aren't as large, so they really can be worn anywhere.


I hope you guys liked this D.I.Y.! If you make a flower headband, please show me on Instagram using #flowerlandifulcrafts, and #wonderlandifulcrafts! Also, don't forget to check out my Instagram page @wonderlandifulcrafts! Bye guys!
Sincerely,
The Wonderlandiful Crafter

Monday, June 13, 2016

Flower Lights

Hey everyone! Today I'll be showing you how to make these super cute, super simple flower lights! This D.I.Y. is part of my #flowerlandifulcrafts series that I am doing this month, so if you make these flower lights, share them with me on Instagram using not only #wonderlandifulcrafts, but also #flowerlandifulcrafts! And don't forget to follow my Instagram page @wonderlandifulcrafts for updates on what I'll be posting, and more! So let's get into the tutorial:

Supplies:
- artificial flowers
- string of lights (they can be a small string of lights with a battery pack like I used, or something like a string of Christmas lights. Really anything works.)
- scissors and/or an x-acto knife (You will need the knife for certain types of artificial flowers. I will show an example later.)


First, take your lights. Mine are from the Dollar Tree from Christmas, so I had to take off little snowflake-shaped pieces to get just the lightbulb part. Do the same if yours has something like mine.

Count the number of lights there are on your string, and find that many flowers that you would like to use for your flower lights.

Next, pull off the green part and the center (if there is one) of the flower. You may also have to cut it off with the scissors, but make sure that you don't damage the flower. (Note: When you take off the green piece of the flower, the layers of the flower will want to fall apart, which can cause them to fall off of the lights later, so you can secure layers together with a few drops of hot glue.)


Now, you will need the x-acto knife I mentioned before if you have any flowers like this sunflower:
You simply need to cut a slit in the center and make it large enough for the lights to poke through it.


Finally, just take each flower and push the lights through the center, and you're done!


I hope you guys enjoy making this craft!
Sincerely,
The Wonderlandiful Crafter

Sunday, June 12, 2016

Floral Sun Hat

Hi guys!
I recently made this super cute floral sun hat just in time for summer, but I wasn't able to get any footage of the creation! :(
But I still really wanted to show you guys how to make it, and it was very simple, so I'm going to walk you through making this adorable sun hat.


The supplies:
- a sun hat/straw hat (I got mine from the Dollar Tree)
- ribbon (optional)
- artificial flowers
- hot glue and hot glue gun

First, take your hat, and if desired, glue on ribbon around it. Next, arrange flowers on the brim of your hat. It looks nice if you go all the way around the hat with flowers, or only in a small section. Hot glue on your flowers one at a time, and you're done!

Variation:

- Glue on small embellishments on and around the flowers, such as rhinestones or small fabric roses, like I did:

You can see small fabric roses I places around my hat; In this picture
you can see silver, bright pink, dark blue, and light purple roses.
- Glue on long pieces of ribbon on the brim of the hat that tie beneath your chin for a fun touch ;)

- Use fabric paint and decorate your hat before decorating it with flowers

- Add other things to the hat like pinecones, seashells, or fake butterflies you can find at the craft store

I hope you guys liked this project! Again, very sorry for not having any picture instructions for this craft. :(
If you decide to make a floral hat like mine, share it with me on Instagram using #wonderlandifulcrafts! Also, check out my Instagram page @wonderlandifulcrafts! And as you would know if you saw my last post, D.I.Y. Flower Crowns, this month I am doing a series of floral crafts, so this month, use the hashtag #flowerlandifulcrafts!
Bye guys!
Sincerely,
The Wonderlandiful Crafter